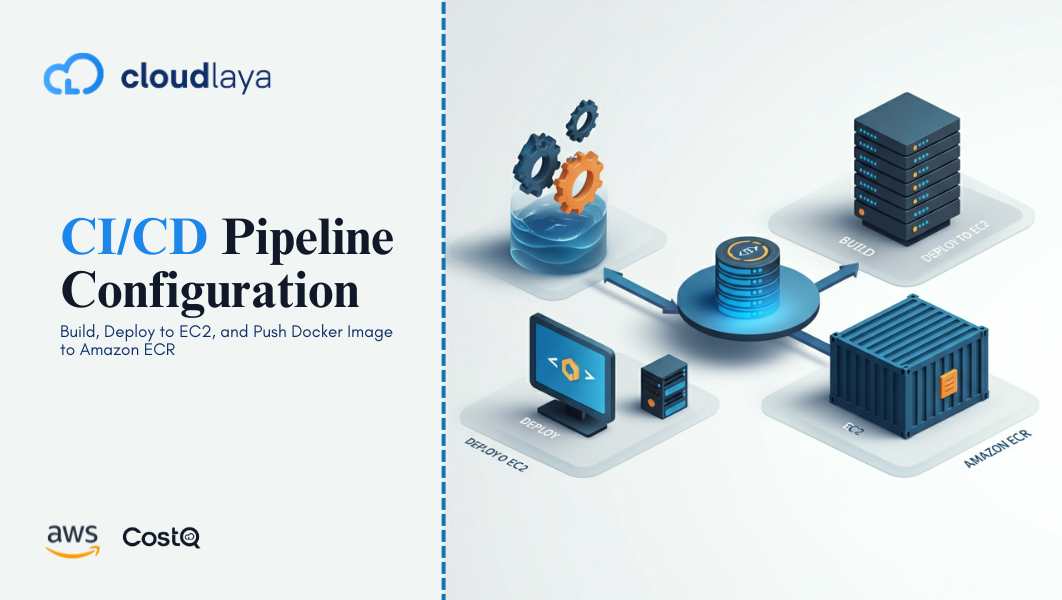
CI/CD Pipeline Configuration: Build, Deploy to EC2, and Push Docker Image to Amazon ECR
CI/CD Pipeline Configuration: Build, Deploy to EC2, and Push Docker Image to Amazon ECR
Overview:
Continuous integration and deployment (CI/CD) configuration are essential to automating the development, testing, and deployment of applications in contemporary software development. This documentation offers a detailed how-to for automating a CI/CD pipeline configuration using GitHub Actions:
- Constructing a Docker Image: Docker containers ensure consistency across many contexts by packaging your programme and its dependencies.
- Pushing the Docker Image to Amazon ECR: Your Docker images are stored and managed by the fully managed Docker container repository, Amazon Elastic Container repository (ECR).
- Installing the Docker Image on an EC2 Instance: You can execute your application in a scalable cloud environment by installing it on Amazon EC2.
Advantages of This Pipeline:
- Automation: By automating the creating, pushing, and deploying processes, the pipeline minimises human mistake and manual intervention.
- Uniformity: Docker guarantees that your application operates uniformly in staging, production, and development environments.
- Scalability: By using EC2, you may take advantage of cloud scalability to manage different traffic and load volumes.
Goals:
The objective of this project is to use a CI/CD pipeline controlled by GitHub Actions to automate the entire process of creating, pushing, and deploying a Dockerized application. Deployment will take place on an Amazon EC2 instance.
Requirements:
Make sure you have the following before you begin:
- GitHub Repository: Your application code is stored on a GitHub repository.
- Amazon ECR Account: An Amazon ECR-configured AWS account.
- EC2 Instance: A Docker-running EC2 instance.
- GitHub Secrets: Amazon ECR and EC2 login credentials.
Step 1: Establish a Local Environment for Development
- Use sudo apt install docker.io to install Docker for Ubuntu.
- Use sudo apt install git to install Git for Ubuntu.
- Create a Clone of Your GitHub Account
- Launch a terminal and create a clone of the repository:
- cd <your-repo-directory> git clone <your-repo-url>
- Change <your-repo-directory> to the directory name and <your-repo-url> to the URL of your real GitHub repository.
- Create a Dockerfile, Ensure you have a Dockerfile in your project root directory. Here’s a basic example for a Node.js application:
Dockerfile for frontend:
# Stage 1: Build the React app

FROM node:18-alpine AS build

# Set working directory

WORKDIR /app

# Copy package.json and package-lock.json

COPY package*.json ./

# Install dependencies

RUN npm install

# Copy the rest of the application files

COPY . .

# Build the React app

RUN npm run build

# Stage 2: Serve the React app using Nginx

FROM nginx:alpine

# Copy the build output to Nginx's web directory

COPY --from=build /app/dist /usr/share/nginx/html

# Expose port 80

EXPOSE 80# Start Nginx server

CMD ["nginx", "-g", "daemon off;"]
- Locally build and test the Docker image
- Use the command “docker build -t my-app:latest” to create the Docker image.
- Use this command to launch the Docker container:docker run -d -p 3000:80 >>call my-app my-app: latest
- Check:
- Go to http://localhost:3000 in a browser window to make if the programme is operational.
Step 2: Configure GitHub and Docker
- Establish an Amazon ECR repository
- Open the AWS Management Console and log in.
- Go to the console for Amazon ECR.
- Select “Create repository.”
- Click Create repository after entering a repository name, such as my-app-repo.
- Establish Secrets on GitHub
- Open the GitHub Secrets page:
1. Access your repository on GitHub.
2. Select Settings.
3. Select Actions under Secrets and Variables.
Add your Amazon credentials:
- AWS_ACCESS_KEY_ID: Your AWS access key ID
- AWS_SECRET_ACCESS_KEY: Your AWS secret access key
Include EC2 Information:
- EC2_HOST: Your EC2 instance’s public IP address or DNS.
- EC2_USERNAME: Your EC2 instance’s SSH username, such as ec2-user.
- EC2_PORT: The SSH port, which is 22 by default.
- EC2_SSH_KEY: The private SSH key used to access your EC2 instance.
Step 3: Configure Amazon ECR
- Verify Docker’s identity with ECR
- To obtain a Docker login command, run the following command:
–username AWS –password-stdin <account-id>.dkr.ecr.<your-region>.amazonaws.com aws ecr get-login-password –region <your- region> | docker login
- Substitute your AWS area for <your-region> and your AWS account ID for <account-id>.
Step 4: Establish a Workflow for GitHub Actions
- Make a workflow file at.github/workflows/deploy.yml in your GitHub repository.
.github/workflows/deploy.yml is the workflow file.
name: Build, publish, and deploy Backend Docker image to EC2

on:
  push:
    branches:
      - master

jobs:
  build:
    runs-on: ubuntu-latest

    steps:
      - name: Checkout code
        uses: actions/checkout@v2

      - name: Configure AWS credentials
        uses: aws-actions/configure-aws-credentials@v1
        with:
          aws-access-key-id: ${{ secrets.AWS_ACCESS_KEY_ID }}
          aws-secret-access-key: ${{ secrets.AWS_SECRET_ACCESS_KEY }}
          aws-region: ap-southeast-1

      - name: Login to Amazon ECR
        id: login-ecr
        uses: aws-actions/amazon-ecr-login@v1

      - name: Build Docker image
        run: |
          docker build -t sandeep-frontend .

      - name: Tag Docker image
        run: |
          docker tag sandeep-frontend:latest 654654282708.dkr.ecr.ap-southeast-1.amazonaws.com/sandeep-frontend:latest

      - name: Push Docker image to Amazon ECR
        run: |
          docker push 654654282708.dkr.ecr.ap-southeast-1.amazonaws.com/sandeep-frontend:latest

  deploy:
    runs-on: ubuntu-latest
    needs: build

    steps:
      - name: Checkout code
        uses: actions/checkout@v2

      - name: Deploy code to EC2
        uses: appleboy/ssh-action@master
        with:
          host: ${{ secrets.EC2_HOST }}
          username: ${{ secrets.EC2_USERNAME }}
          key: ${{ secrets.EC2_SSH_KEY }}
          port: ${{ secrets.EC2_PORT }}
          script: |
            docker pull 654654282708.dkr.ecr.ap-southeast-1.amazonaws.com/sandeep-frontend:latest
            docker stop frontend || true
            docker rm frontend || true
            docker run -d --name frontend -p 3000:80 654654282708.dkr.ecr.ap-southeast-1.amazonaws.com/sandeep-frontend:latest
Step 5: Set up the EC2 instance
5.1. Install Docker on the EC2
- Connect to your EC2 instance via SSH:
- ssh -i/path/to/your-key.pem ec2-user@<EC2_HOST>
- Install Docker:
- sudo apt install docker.io
5.2. Set Up Groups for Security
- Verify if the EC2 security group permits:
- Application activity on the necessary port (such as port 3000) and SSH access on port 22.
Step 6: Confirm Workflow Implementation
6.1. Upload Modifications to GitHub
- Update your GitHub repository’s master branch by committing and pushing changes there:
- git add .
- git commit -m “deploy to ec2”
- git push origin master
6.2 Check workflow:
- To track the status of the workflow, navigate to your GitHub repository’s Actions tab.
6.3 Verify EC2 Deployment
- Make sure the Docker container is operating by logging in via SSH to your EC2 instance:
- sudo docker ps
- Make sure the programme can be accessed:
- Go to http://<EC2_HOST>:<PORT> in a browser (for example, `http://\EC2 HOST
Conclusion
Software deployment is transformed when a CI/CD Pipeline Configuration is implemented using GitHub Actions, Docker, Amazon ECR, and EC2. This pipeline provides efficiency, consistency, and scalability by automating the building, pushing, and deploying of Dockerized apps, hence eliminating manual errors.
This configuration of the CI/CD pipeline allows developers to:
Maintain a consistent environment throughout development, staging, and production by automating deployment operations, which will save downtime and increase efficiency. Use Amazon EC2 for scalable hosting and Amazon ECR for safe container storage.
Teams may expedite software releases, improve security, and guarantee quicker, more dependable deployments by including CI/CD Pipeline Configuration, opening the door for a solid and effective DevOps process.
Develop a Scalable OTT Platform on AWS: Secure & Reliable 24/7
Mastering AWS Cost Allocation Tagging: Optimize Cloud Spend with Best Practices In 2025.
Unlocking Game-Changing Insights with Amazon Q: The Future of Business Intelligence